The single most effective routine: empty your trash can completely, wipe it dry every time you change the bag, and do a full disinfecting scrub once a month. That’s it. Do those three things consistently and you’ll stop most odors before they start, cut down on pest attraction, and avoid the kind of bacterial buildup that makes a bin genuinely hazardous to handle.
Here’s why that matters more than most people realize. The Hygiene Council found that residential kitchen trash cans harbor a high variety of bacteria, including pathogens like Salmonella, E. coli, and Listeria. Your kitchen bin isn’t just smelly. It’s often one of the dirtiest surfaces in the house. The CDC recommends a fresh bleach solution at a 1:9 ratio (1 part bleach to 9 parts water) for disinfecting hard, non-porous surfaces, and that guidance applies directly to plastic and metal trash cans.
The core steps, in order:
- Empty the can completely and remove the liner
- Knock out or rinse any loose debris
- Wash with hot soapy water and scrub the interior, rim, and lid
- Rinse thoroughly, then disinfect with a fresh bleach solution
- Dry completely before replacing the liner
- Place baking soda or a charcoal sachet under the new liner
Pro Tip: Never skip the drying step. A damp can is where odors and mold take hold fastest. Tip the bin upside down for 10–15 minutes or wipe it dry with an old towel before putting in a fresh bag.
Table of Contents
- What daily and weekly habits actually prevent odor buildup?
- How to clean a kitchen or indoor trash can the right way
- How to clean large outdoor and wheeled curbside bins
- How often should you clean your trash cans?
- What products actually work for cleaning and deodorizing?
- How do you keep maggots, flies, ants, and rodents out of your bins?
- How do you fix stubborn odors, stains, and plastic that won’t stop smelling?
- When does hiring a professional bin-cleaning service make sense?
- Key Takeaways
- The habit most homeowners skip (and why it costs them later)
- Professional curbside bin cleaning: what it includes and how to choose a provider
- Useful sources and further reading
What daily and weekly habits actually prevent odor buildup?
Most homeowners wait until the bin smells before they clean it. By that point, you’re dealing with biofilm and embedded residue that takes real effort to remove. Frequent, small-scale cleaning is what keeps the job manageable.
Daily (30–60 seconds): Wipe the lid and handle with a damp cloth or disinfecting wipe each time you take out the trash. Check that the liner is seated properly and hasn’t shifted to expose the can wall. If you toss anything wet, tie off that bag and take it out rather than letting it sit.
Weekly (5–10 minutes): Pull the liner, shake out any crumbs or debris, and give the interior a quick rinse or spot-clean. Leave the lid open for a few minutes to air out. Check the bottom of the can for any liquid pooling under the liner, which is the most common source of persistent smell.
The payoff is real. Sanitation professionals consistently point out that waiting for a bin to smell usually means the cleaning job ahead is significantly more intensive. A short daily wipe takes far less effort than a lengthy scrub of a bin that’s been neglected for weeks. Think of it the same way you’d think about wiping down a stovetop: do it while it’s easy, not after it’s baked on.
How to clean a kitchen or indoor trash can the right way
What you need before you start
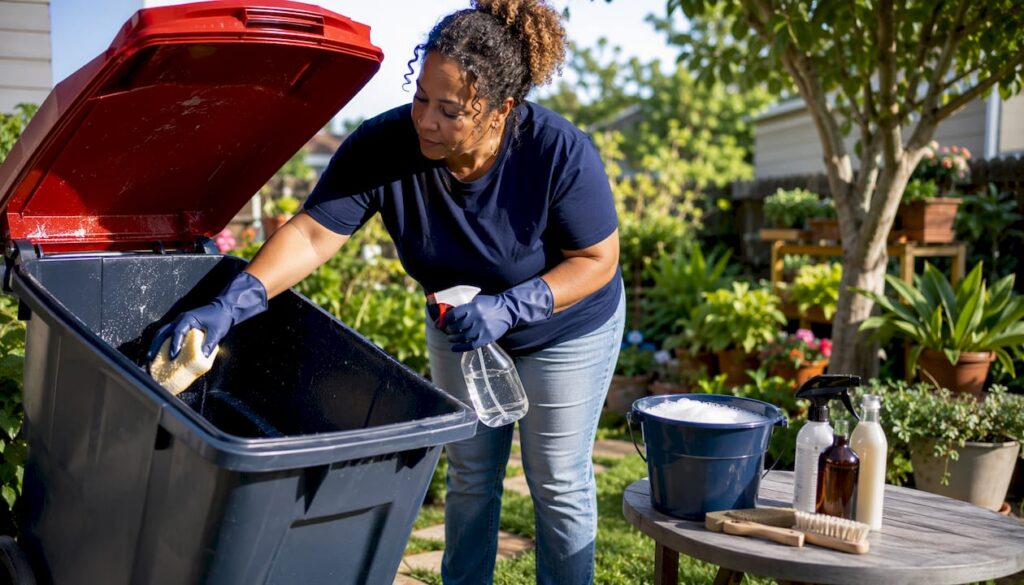
Gather rubber gloves, a long-handled scrub brush, dish soap or an all-purpose cleaner, a fresh bleach solution (mixed right before use), and paper towels or an old rag for drying. Clean the bin in a bathtub, utility sink, or outside on a patio where you can rinse freely without worrying about runoff.
The step-by-step routine
- Remove the liner and any loose debris. Shake the can over an outdoor trash bag or compost bin to get out crumbs and small pieces.
- Pre-rinse with hot water. A quick rinse loosens stuck-on residue before you apply soap.
- Scrub with hot soapy water. Use your brush to scrub the interior walls, the bottom, the rim, and the underside of the lid. Pay attention to corners and the hinge area where grime collects.
- Rinse thoroughly. Make sure no soap residue remains, since leftover detergent can trap odors.
- Disinfect. Apply a fresh bleach solution at the CDC-recommended 1:9 ratio (1 part bleach to 9 parts water). Let it sit for the dwell time specified on your bleach label, typically at least one minute, before rinsing.
- Dry completely. Tip the can upside down or wipe it dry. Do not skip this step.
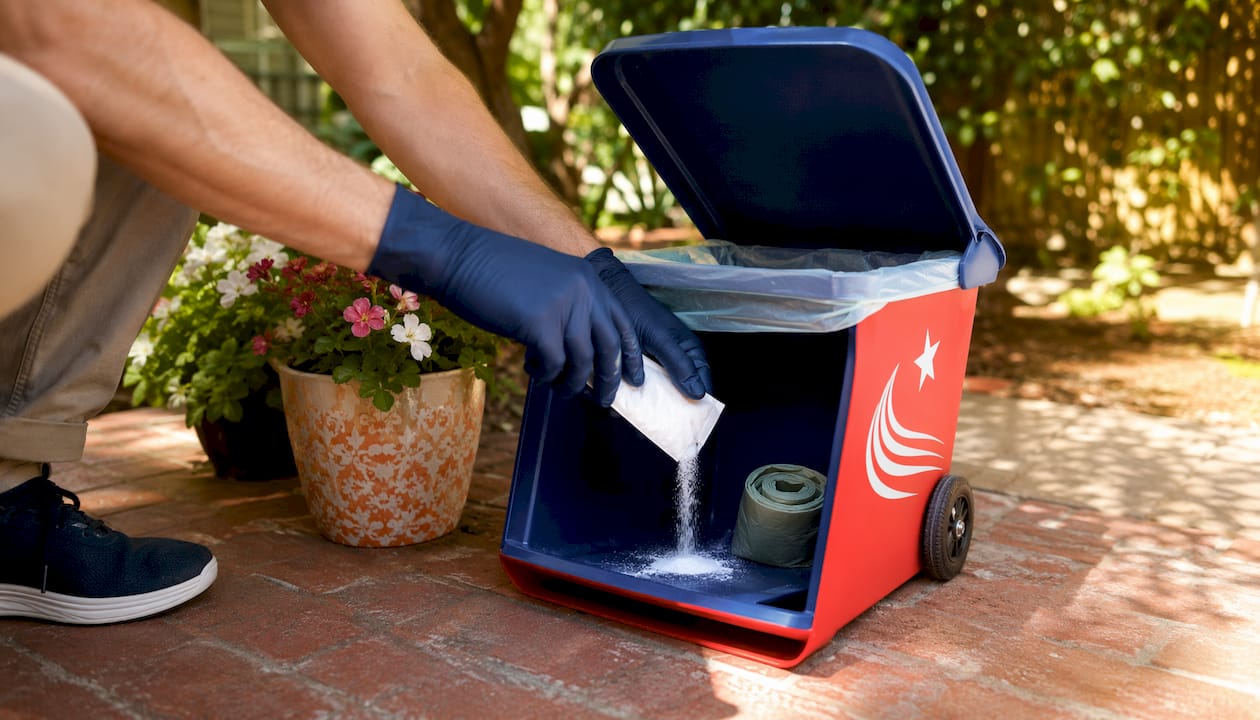
- Deodorize under the liner. Sprinkle baking soda in the bottom of the dry can, or place a charcoal sachet or essential-oil cotton pad (tea tree and lemon work well) before dropping in the new bag.
Bleach dilution reminder: The CDC’s 1:9 ratio is commonly described as about 1.5 cups of bleach per gallon of water. Always mix a fresh batch for each cleaning session. Never store diluted bleach solutions for later use.
Material-specific notes
Thin plastic bins can warp or discolor with undiluted bleach or abrasive scrubbing pads. Use a soft brush and diluted solutions only. Stainless steel cans handle bleach well but can streak, so rinse and dry promptly. Rubber-gasketed lids need special attention: lift the gasket and clean underneath it, since that’s where odor-causing residue hides.
Safety warning: Never mix bleach with ammonia or vinegar. The combination produces toxic fumes. Always work in a ventilated area when using bleach-based disinfectants, and keep the window open or the fan running.
How to clean large outdoor and wheeled curbside bins
Tools and prep
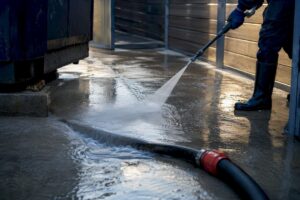
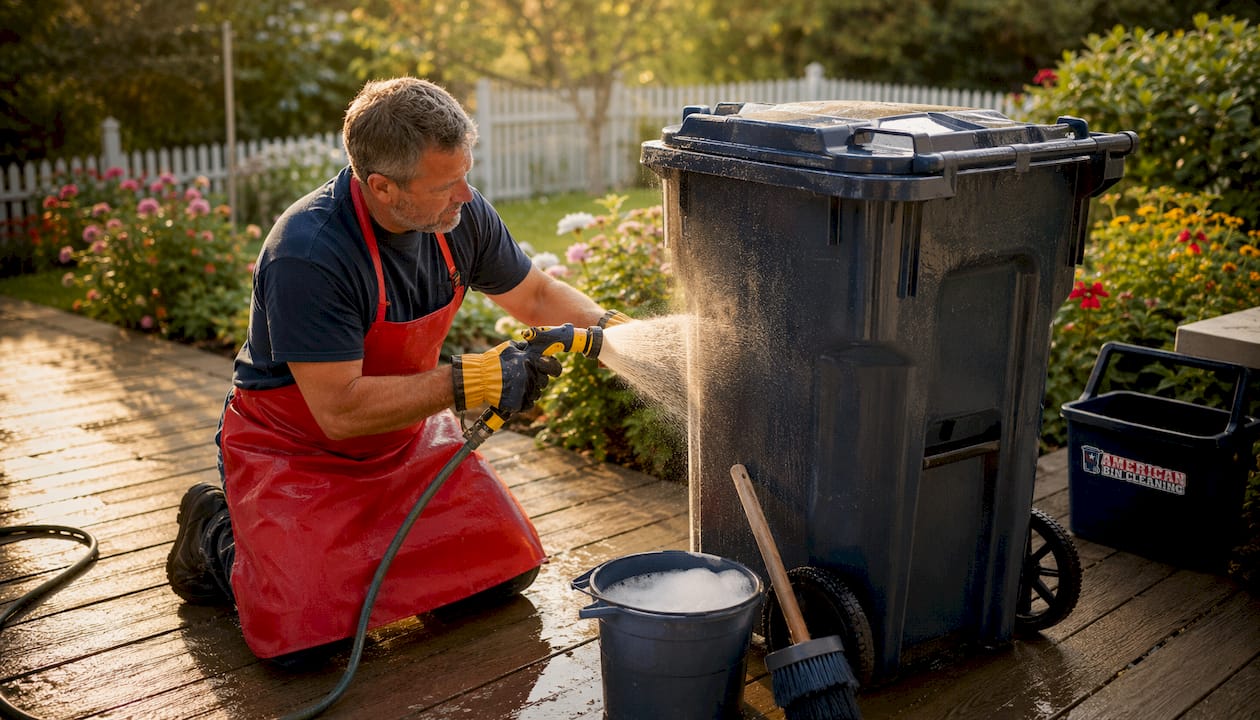
You’ll need heavy-duty rubber gloves, a long-handled stiff brush, a degreasing dish soap or outdoor cleaner, and a garden hose or pressure washer set to a moderate pressure (around 1,200–1,500 PSI is enough for most plastic bins without cracking them). Have a bucket or catch basin ready if you’re cleaning in an area where runoff could reach a storm drain.
Pro Tip: The best time to clean an outdoor bin is right after collection day, when it’s already empty. You won’t have to deal with partial loads, and the bin is at its lightest and easiest to maneuver.
Step-by-step outdoor routine
- Empty the bin completely and remove any stray debris from the bottom.
- Pre-soak greasy areas. Spray or pour a small amount of dish soap directly onto stuck-on grease and let it sit for two to three minutes.
- Scrub the interior and lid. Work from top to bottom so loosened debris falls down and out.
- Rinse with the hose or pressure washer. Angle the spray so water flows out the opening rather than pooling inside.
- Disinfect if needed. For bins that have held meat waste, pet waste, or anything that’s leaked, apply a diluted bleach solution and let it dwell before rinsing.
- Tip the bin on its side and let it air-dry in direct sunlight. UV exposure helps neutralize odors embedded in porous plastic, a step that’s easy to skip but genuinely effective.
Outdoor bins cleaned on a regular schedule after collection day stay cleaner longer because you’re not letting waste residue bake in for weeks. The sun-drying step alone can reduce lingering smells that survive a basic rinse.
Environmental note: Avoid letting concentrated bleach or detergent run directly into storm drains. If you’re cleaning near a curb or driveway drain, use low-toxicity cleaners or capture the rinse water in a bucket. Eco-friendly bin cleaning methods that use biodegradable soaps are a practical alternative when runoff is a concern.
How often should you clean your trash cans?
The honest answer is: more often than most people do, but less often than you’d fear if you keep up with the quick daily habits.
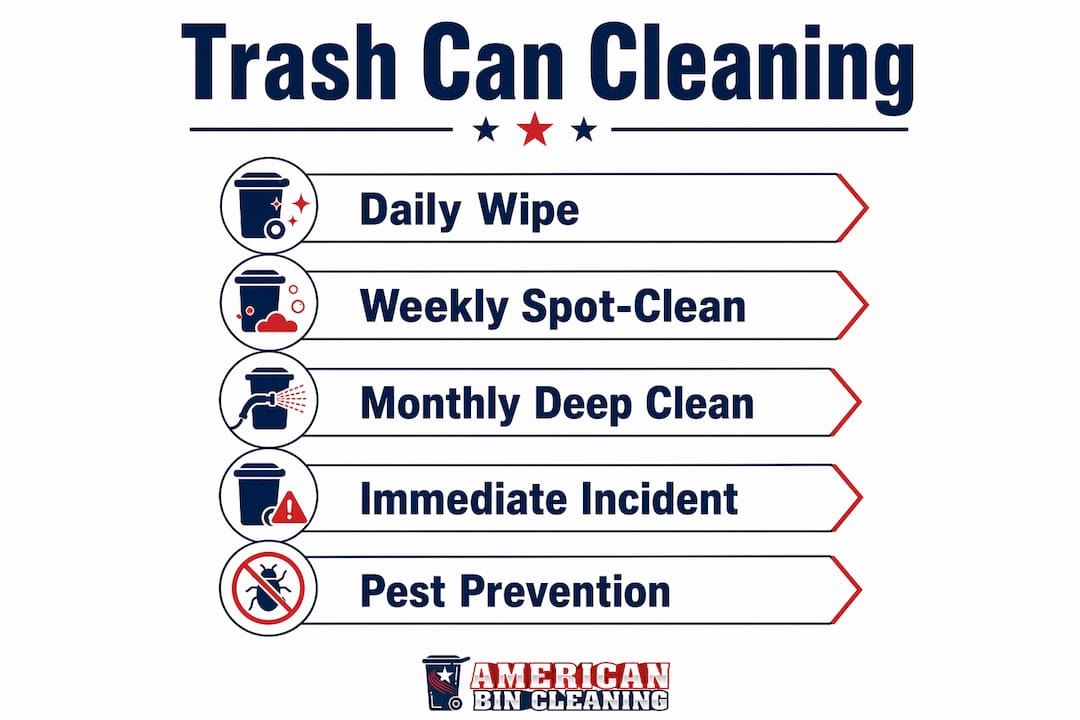
Daily (30–60 seconds): Wipe the lid and handle. Check the liner. Tie off wet waste immediately.
Weekly (5–10 minutes): Spot-clean the interior, rinse if needed, and air the can briefly.
Monthly (15–30 minutes for indoor; 30–60+ minutes for outdoor): Full deep clean and disinfect for all household bins. Lysol’s guidance aligns with this: weekly wipes and regular deep cleans are the standard recommendation from major cleaning brands. Professionals advise the same, noting that monthly deep cleaning and immediate cleanup after spills are the most effective ways to prevent biofilm from forming.
Incident-based (immediately): Any time a bag breaks, raw meat leaks, or you spot signs of rodents or maggots, clean the bin right away. Use PPE (gloves, and a mask if the smell is strong), remove all waste carefully, and disinfect thoroughly before using the bin again.
If you’re weighing DIY versus hiring a service, the time math is worth doing. A periodic deep clean of outdoor bins plus a kitchen bin typically involves about an hour or more of active work, plus drying time. For homeowners with limited mobility, a packed schedule, or recurring pest issues, that’s often where a professional service starts to make more sense than the DIY route.
What products actually work for cleaning and deodorizing?
Store-bought options worth using
EPA-registered disinfectants are the most reliable choice for killing pathogens. Follow the label’s dwell time exactly: surface cleaning without the correct contact time often doesn’t achieve sanitizing goals. Grease-cutting dish soap (Dawn is a common choice) handles the degreasing step well before you apply a disinfectant. Odor-absorbing charcoal filters placed under the liner last several weeks before needing replacement.
DIY mixes that hold up
- Dish soap + hot water: The workhorse cleaning solution for most bins. Effective at cutting grease and lifting residue.
- 1:1 white vinegar and water: Good for odor removal on surfaces that don’t need disinfecting. Do not use vinegar in combination with bleach.
- Baking soda under the liner: Absorbs moisture and neutralizes acid-based odors passively. Cheap and genuinely effective.
- Essential-oil cotton pads: A few drops of tea tree or lemon oil on a cotton ball placed under the liner provides mild antimicrobial action and a neutral scent. Experts recommend charcoal filters and essential-oil pads as practical odor absorbers that neutralize rather than mask smells.
Safety rules that matter
Never mix bleach with vinegar or ammonia. Always prepare a bleach solution fresh for each session using the CDC’s 1:9 ratio. Avoid abrasive powders (like Comet) on thin plastic bins: they scratch the surface, creating micro-grooves where bacteria and odors embed more easily. For stainless steel, skip anything acidic that could pit the finish.
One common DIY mistake is pouring undiluted bleach directly into a bin. Concentrated bleach can damage plastic, create fumes in an enclosed space, and doesn’t actually clean better than the diluted version. Dilute it first, always.
How do you keep maggots, flies, ants, and rodents out of your bins?
Pests don’t appear randomly. They follow food odors, moisture, and easy access. Remove those three things and you remove most of the problem.
Prevent attractants first. Double-bag raw meat, fish, and diapers before they go in the bin. Drain liquids from food containers and rinse them before tossing. Keep the lid closed at all times, not just when you’re done using the bin. A lid left cracked for even a few hours on a warm day is enough for flies to lay eggs.
Physical barriers matter. A tight-fitting lid is your first line of defense. In areas with raccoons or other wildlife, a bungee cord or bin lock across the lid is worth the small investment. Bag clips that seal the liner at the top prevent flies from reaching waste even if the lid is briefly open.
Active deterrents that work. Baking soda and charcoal sachets under the liner reduce the odor signals that attract insects. Essential-oil cotton pads with tea tree oil have mild repellent properties. Keep bins out of direct sunlight when possible: heat accelerates decomposition and intensifies odors, which draws more pests. Elevating outdoor bins slightly off the ground (on a pallet or rack) also discourages ants and rodents from nesting underneath.
If you already have an infestation: Put on gloves and a mask before opening the bin. Remove all waste carefully into a sealed bag. Scrub and disinfect the interior thoroughly, paying attention to the bottom seam where maggots tend to cluster. For a serious rodent problem, professional pest control is worth calling in alongside your bin-cleaning routine, since the two problems usually need to be addressed together.
How do you fix stubborn odors, stains, and plastic that won’t stop smelling?
Biofilm and embedded grease
Biofilm is a thin layer of bacteria that adheres to surfaces and resists a basic soap-and-water wash. If your bin smells clean right after washing but the odor returns within a day or two, biofilm is likely the cause. The fix:
- Apply an enzyme cleaner (available at most hardware stores) directly to the affected area and let it sit for 15–20 minutes. Enzyme cleaners break down organic matter that standard detergents leave behind.
- Follow with a thorough scrub and rinse.
- Disinfect with a fresh bleach solution at the 1:9 ratio.
- Repeat the process on the next cleaning cycle if the smell persists.
Plastic that holds odors
Old or porous plastic absorbs odors at a molecular level, and no amount of scrubbing fully removes them. Your best options: fill the dry bin with a baking-soda-and-water solution and let it soak for several hours, then rinse and sun-dry in full sunlight. UV exposure from direct sun is genuinely effective at breaking down odor compounds embedded in plastic. If the bin is more than five to seven years old and the smell is persistent despite repeated cleaning, replacement is often the more practical choice.
Persistent smells despite regular cleaning
Check the lid hinges and any ventilation holes: debris and moisture collect there and are easy to miss. Scrub those areas with a small brush. The base of the bin where it contacts the ground is another common trap for residue. Scented liners or charcoal filters under the bag can manage odors as a temporary measure while you work through a deeper cleaning cycle.
When to stop DIY: if you’re dealing with a heavy rodent infestation, visible mold growth that returns after cleaning, or a bin that poses a genuine health risk (raw sewage, significant pest activity), call a professional. Some situations go beyond what a garden hose and a bottle of bleach can safely address. Understanding what bin cleaning removes completely helps set realistic expectations for what DIY can and cannot fix.
When does hiring a professional bin-cleaning service make sense?
The honest trigger points: you’re dealing with recurring infestations, you don’t have the time or physical ability to do a proper monthly deep clean, or your bins are simply getting worse despite regular DIY effort. Curb appeal is also a real factor for many homeowners. A stained, odorous bin at the end of the driveway is one of those things neighbors notice.
What professional services actually do
High-quality bin-cleaning services use high-pressure washing systems that reach temperatures and pressures a garden hose can’t match. They apply eco-friendly disinfectants and capture all wastewater in onboard recycling systems, so nothing runs into storm drains or onto your property. Most offer scheduled curbside programs (monthly, bi-monthly, or quarterly) so the service happens automatically after collection day without you needing to be home. Some also handle dumpster pad cleaning for homes with shared waste areas.
Questions to ask any provider
Before you sign up with a bin-cleaning service, ask:
- Do you capture wastewater, or does it run off into the street?
- What disinfectant do you use, and is it EPA-registered?
- What’s your scheduling model: per-clean pricing or a subscription plan?
- Do I need to be home for the service?
- What happens if my collection day changes?
The environmental safeguards matter more than most homeowners realize. Bleach and detergent runoff into storm drains is an actual water-quality issue, not just a technicality. A provider that captures wastewater is doing the job correctly. One that doesn’t is cutting a corner that has real consequences.
For homeowners who want the convenience of bin cleaning without being home, a scheduled curbside plan removes the task from your list entirely.
Key Takeaways
Consistent trash can hygiene comes down to one daily wipe, a monthly disinfecting scrub with a fresh 1:9 bleach solution, and odor absorbers under the liner.
| Point | Details |
|---|---|
| Daily wipe prevents buildup | A 30–60 second lid and handle wipe after each trash removal stops biofilm before it starts. |
| Monthly deep clean is the standard | Full scrub, disinfect with CDC’s 1:9 bleach-to-water ratio, and dry completely every month. |
| Odor absorbers work under the liner | Baking soda, charcoal sachets, or essential-oil cotton pads neutralize odors at the source. |
| Never mix bleach with vinegar or ammonia | Combining these chemicals produces toxic fumes; always prepare bleach solutions fresh. |
| Abcbins handles it all curbside | American Bin Cleaning offers scheduled high-pressure cleaning with full wastewater capture throughout Chicagoland. |
The habit most homeowners skip (and why it costs them later)
Here’s what years of professional bin cleaning make obvious: the problem is almost never that homeowners don’t know they should clean their bins. It’s that they underestimate what’s actually growing in there between cleans.
A kitchen trash can that gets a new liner every few days but never gets washed is accumulating a bacterial load that most people would find alarming if they could see it. The Hygiene Council’s findings on kitchen bin bacteria aren’t a scare tactic. They’re a description of what happens when organic waste, moisture, and warmth combine in a container that’s rarely cleaned. Salmonella and E. coli don’t require a dramatic spill to take hold. A small drip from a meat package, left for two weeks, is enough.
The other mistake I see constantly: homeowners who do clean their bins but skip the drying step. A wet bin with a fresh liner is almost as bad as a dirty one. Moisture is what feeds mold and odor-causing bacteria. Drying takes five minutes and changes the outcome entirely.
Routine maintenance isn’t about perfection. It’s about keeping the problem small enough that you can handle it yourself, on your schedule, without it ever becoming a health issue. The homeowners who stay ahead of it spend less time cleaning overall, not more.
Professional curbside bin cleaning: what it includes and how to choose a provider
Cleaning your own bins is entirely doable with the right routine. But for homeowners who want the job handled reliably, on a schedule, without lifting a hose, a professional curbside service is a practical alternative worth knowing about.
Abcbins (American Bin Cleaning) has served Chicagoland homeowners since 1989 with scheduled curbside bin cleaning that requires no one to be home. The process uses high-pressure hot water cleaning that kills 99.99% of bacteria, eco-friendly disinfectants, and a fully enclosed wastewater capture system so nothing runs off into the street or storm drains. Service plans run monthly, bi-monthly, quarterly, or on-demand, and the cleaning happens right after your collection day so bins are always at their emptiest.
For homeowners evaluating any provider, the checklist is short: confirm they capture wastewater, use EPA-registered disinfectants, offer flexible scheduling, and don’t require you to be present. Those four criteria separate a professional operation from someone with a pressure washer and a truck.
If you’re in the Chicagoland area and ready to take the task off your list, see available service plans or check local coverage for Barrington and surrounding communities. Getting started takes a few minutes and keeps your bins clean year-round.
Useful sources and further reading
The table below lists the primary sources cited in this article, what each covers, and why it’s worth bookmarking.
| Source | What it covers | Why it matters |
|---|---|---|
| CDC — Disinfecting guidance | Bleach dilution ratios and disinfecting hard, non-porous surfaces | Primary authority for the 1:9 bleach-to-water ratio used throughout this article |
| Bon Appétit — Kitchen trash can bacteria | Hygiene Council findings on bacterial variety in kitchen bins | Explains why kitchen bins harbor pathogens like Salmonella, E. coli, and Listeria |
| Lysol — How to clean trash cans | Weekly wipe and monthly deep-clean frequency guidance | Manufacturer-backed cleaning schedule and dwell-time advice for disinfectants |
| Super Warranty — Outdoor trash can cleaning | Timing and method for outdoor bin cleaning after collection day | Practical guidance on when and how to clean wheeled curbside bins |
| Jama Cleaning — Garbage can odors | Step-by-step wash sequence and deodorizing options including sun-drying | Covers baking soda, charcoal, and UV exposure for persistent plastic odors |
| Yahoo Shopping — Expert odor tips | Essential-oil cotton pads and charcoal filters as odor neutralizers | Expert-sourced deodorizing tactics that go beyond basic baking soda |
| AOL — Why bins smell after emptying | Biofilm formation and the case for immediate spill cleanup | Explains why odors persist and why monthly deep cleaning prevents embedded residue |
| Abcbins — Why bins need deep cleaning | Professional service features: high-pressure cleaning, wastewater capture, scheduled plans | Describes what a professional bin-cleaning service does and why it differs from DIY |
| Abcbins — Common bin cleaning mistakes | DIY pitfalls including undiluted bleach, skipping drying, and no wastewater capture | Practical error list with safer alternatives for homeowners cleaning their own bins |