Rural homeowners face a pest control challenge that suburban neighbors simply don’t: more entry points, more wildlife pressure, more outbuildings, and far fewer neighbors to notice a problem early. The eight highest-impact actions you can take right now are: seal foundation cracks and utility penetrations, clear wood piles and dense vegetation from the home’s perimeter, fix moisture problems (gutters, grading, crawlspace), secure all food and waste containers, inspect crawlspaces and outbuildings, set snap traps and monitoring stations, protect exposed wood structures with paint or sealant, and call a licensed pest control professional when you see active termite mud tubes, heavy rodent droppings, or wasp nests in the eaves.
- Seal entry points: Caulk cracks wider than 1/4 inch; use steel wool plus foam for utility penetrations.
- Clear vegetation: Keep shrubs 18 inches from the foundation; stack firewood at least 20 feet away.
- Fix moisture: Repair leaking gutters, regrade soil away from the foundation, and ventilate crawlspaces.
- Secure food and waste: Use bins with locking lids; clean them on a regular schedule.
- Inspect outbuildings: Check barns, sheds, and grain storage monthly for droppings and gnaw marks.
- Set traps and monitors: Place snap traps along walls in garages and outbuildings; check weekly.
- Protect wood structures: Paint or seal exposed wood; replace any wood in direct soil contact.
- Call a pro when: You spot active termite mud tubes, a large wasp nest, or rodent droppings in multiple rooms.
Health and safety alert: Wasp nests in eaves, active termite mud tubes, or heavy rodent droppings in living areas are not DIY situations. Call a licensed pest control professional immediately.
Professional inspections typically run around $200 for an initial visit, with quarterly follow-up service near $120. Waiting until an infestation is visible costs far more: roach treatments average around $500 and rat infestations around $1,000.
Pro Tip: Budget $100–$300 annually for routine pest inspections. That single line item on your rural home maintenance checklist is the cheapest insurance you can buy against structural damage.
Key Takeaways
Consistent prevention — sealing, monitoring, and cleaning — costs a fraction of what a single reactive treatment runs, and it protects your property’s structural integrity year after year.
| Point | Details |
|---|---|
| Seal entry points first | Caulk, door sweeps, and hardware cloth are the highest-ROI pest prevention steps. |
| Clean bins regularly | Food residue in garbage bins actively attracts rodents, flies, and raccoons. |
| Budget $100–$300 annually | Routine inspections cost far less than treating an established infestation. |
| Call a pro for structural signs | Active termite mud tubes, heavy rodent activity, or large wasp nests need a licensed technician. |
| Abcbins removes a key attractant | Professional bin cleaning on a recurring plan eliminates the food odors that draw pests to your property. |
Table of Contents
- What does a pest control checklist for rural homeowners cover?
- How do you build a protective barrier around a rural home?
- Common rural pests: what they look like and what to do first
- When should you hire a pest control professional?
- Pesticide safety, PPE, and the three C’s for spill response
- How to prepare your property for a pest-control visit
- A seasonal pest schedule for rural properties
- Printable pest control checklist for rural homeowners
- Why prevention beats chasing infestations after the fact
- Clean bins mean fewer pests: how Abcbins helps rural homeowners
- Sources
What does a pest control checklist for rural homeowners cover?
Rural properties have exposure points that standard checklists miss entirely. Here is how to walk yours systematically.
Exterior walkthrough
- Foundation: look for cracks, gaps around pipes, and soil piled against siding.
- Roofline and eaves: check for missing soffit panels, open vents, and wasp nest starts.
- Doors and windows: test weatherstripping; look for daylight gaps at the base of garage doors.
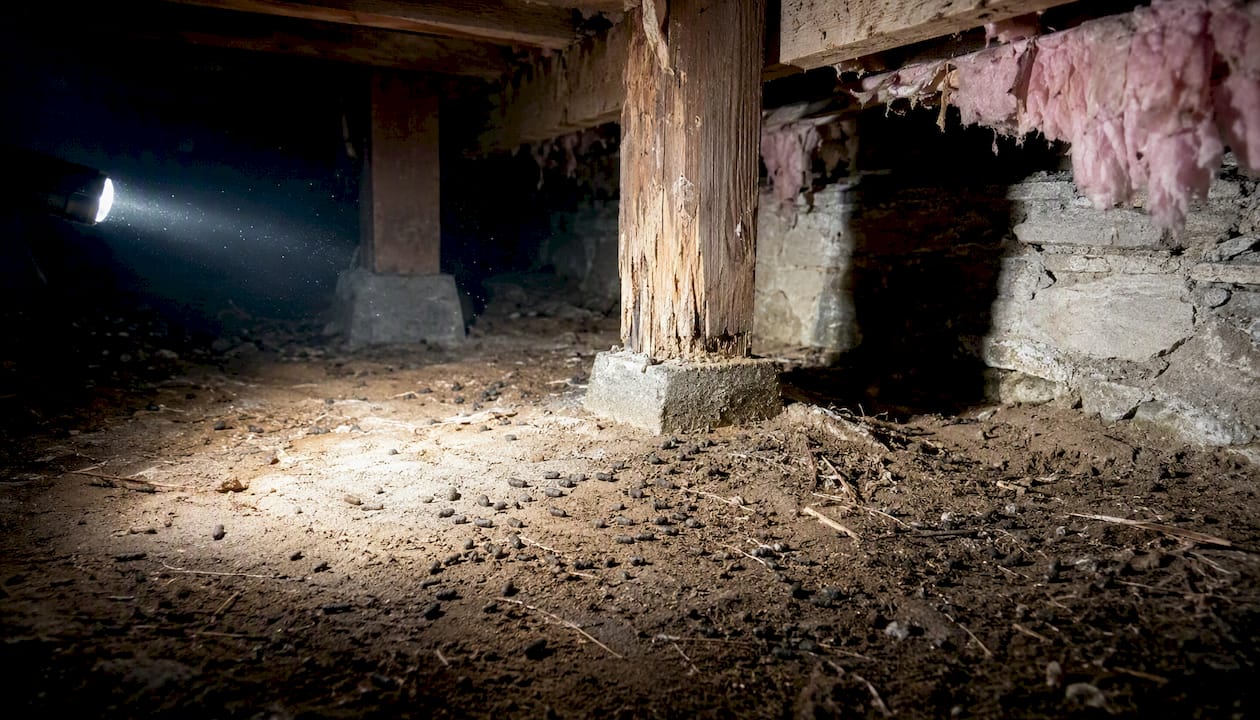
- Crawlspace entry: inspect the vent screens for holes; look for mud tubes on piers.
- Outbuildings and barns: check corners, rafters, and floor edges for droppings, gnaw marks, and nests.
- Woodpiles: look for rodent runways (compressed grass paths) and carpenter ant frass (coarse sawdust).
- Grain and feed storage: check bags and bins for chew holes; look for rodent droppings on shelves.
- Animal enclosures: inspect for burrowing entry points under fencing.
- Perimeter fencing: look for gaps at ground level where rodents and groundhogs push through.
Interior walkthrough
- Crawlspace and basement: mud tubes on joists, moisture staining, rodent droppings, and insulation disturbance.
- Attic: look for bat or squirrel entry points, nesting material, and droppings near the eaves.
- Behind appliances: grease and food residue attract cockroaches; check for droppings and egg cases.
- Pantry: inspect for chew holes in packaging, rodent droppings, and weevil activity in grain products.
- Garage and wall voids: listen for scratching at night; look for grease marks along baseboards.
Pro Tip: Walk the exterior after dusk with a flashlight in spring and fall. Rodent runways, raccoon tracks in soft soil, and active wasp entry points are far easier to spot when the animals are moving.
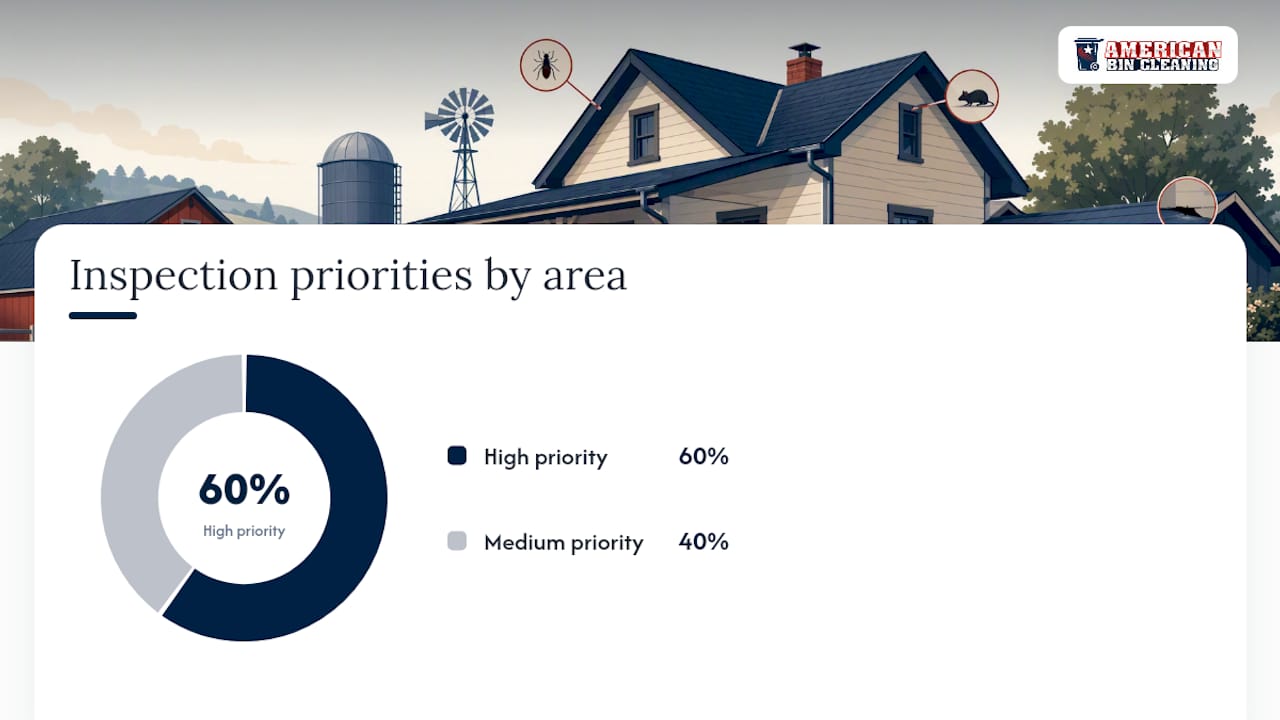
| Area | Warning signs | Priority |
|---|---|---|
| Crawlspace | Mud tubes, droppings, moisture | High |
| Outbuildings | Gnaw marks, nesting, frass | High |
| Grain/feed storage | Chew holes, droppings | High |
| Attic | Entry gaps, nesting material | Medium |
| Pantry | Chewed packaging, weevils | Medium |
How do you build a protective barrier around a rural home?
Industry guidance confirms that a multi-layered barrier — sealing, vegetation management, and moisture control — outlasts chemical treatment alone. Here is how to build it.
Sealing common entry points:
- Caulk foundation cracks and gaps around pipes with polyurethane or silicone.
- Install door sweeps on all exterior doors, including the garage.
- Cover attic and crawlspace vents with 1/4-inch hardware cloth.
- Stuff steel wool into utility penetrations before foaming them shut.
Vegetation and landscape:
- Keep shrubs and ornamentals at least 18 inches from the foundation.
- Trim tree branches that overhang or touch the roofline.
- Stack firewood at least 20 feet from the house, off the ground on a rack.
- Move compost bins at least 30 feet from the home; use a sealed tumbler if possible.
- Avoid deep mulch beds directly against the foundation — they hold moisture and shelter insects.
Moisture control:
- Clean gutters twice a year and extend downspouts at least 4 feet from the foundation.
- Regrade soil so it slopes away from the house at roughly 1 inch per foot for 6 feet.
- Install a vapor barrier in crawlspaces; consider full encapsulation in wet climates.
- Fix dripping faucets and leaking hoses promptly — standing water draws mosquitoes within days.
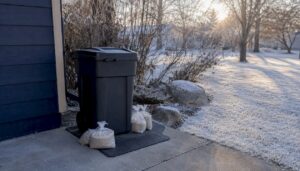
Waste and bin management are often the fastest win. Homeowners consistently identify kitchens and waste areas as the highest-risk pest zones. Bins with loose lids or food residue on the rim actively attract rodents and flies. Locking lids and a regular bin sanitation schedule cut that pressure significantly.
Pro Tip: Fix the cheapest exclusion items first: a $4 door sweep and $8 of caulk block the same entry points as a $200 perimeter spray, and they work 24 hours a day.
Common rural pests: what they look like and what to do first
Rodents (mice and rats)
Rodents chew through wiring, insulation, and wood framing, and their droppings carry hantavirus and salmonella. Signs: droppings along walls, grease marks on baseboards, gnaw marks on wood or plastic. First action: place snap traps along walls (not in the open) and seal any gap larger than a dime.
Termites
Subterranean termites are the most destructive pest in the U.S. Signs: mud tubes on foundation piers or joists, hollow-sounding wood, and swarms of winged insects in spring. Do not disturb mud tubes — call a licensed pest control professional. DIY bait stations can slow activity but rarely eliminate an established colony.
Carpenter ants
They don’t eat wood, but they excavate it. Signs: coarse sawdust (frass) near wood, large black ants trailing at night. First action: eliminate moisture sources and replace any wood in direct soil contact.
Ticks
Ticks transmit Lyme disease, Rocky Mountain spotted fever, and several other pathogens. In the Midwest, the blacklegged tick (deer tick) is the primary concern. Mow grass short, create a wood-chip barrier between lawn and wooded areas, and check yourself and pets after every outdoor activity. Remove an attached tick with fine-tipped tweezers, pulling straight out without twisting.
Wasps and hornets
A single bald-faced hornet nest can hold several hundred insects. Signs: papery gray nests in eaves, under decks, or in shrubs. Small, early-season nests (golf ball size) can be treated at night with a commercial wasp freeze spray. Anything larger belongs to a professional.
Raccoons
Raccoons damage roofing, soffits, and attic insulation. They also carry rabies and raccoon roundworm. Secure garbage bins with bungee cords or locking lids; cap chimneys with a commercial chimney cap.
A note on beneficial insects: When treating for wasps or ants near flowering plants, apply pesticides in the evening when pollinators are not active. Avoid broadcast spraying near water sources — runoff harms aquatic insects and fish.
A 2026 industry survey found only 22% of Americans feel fully confident managing pests on their own, and more than half consider professional treatment more effective than DIY methods.
When should you hire a pest control professional?
Call a licensed professional when you see any of these:
- Active termite mud tubes or hollow-sounding structural wood.
- Rodent droppings in more than one room, or evidence of nesting in walls.
- A wasp or hornet nest larger than a softball, or one inside a wall void.
- Persistent activity after two rounds of DIY treatment.
- Any sign of bats roosting in the attic (protected species; removal requires a licensed wildlife operator).
Cost and timeline benchmarks:
| Service | Typical cost | Frequency |
|---|---|---|
| Initial inspection | ~$200 | Once (or annually) |
| Rodent infestation treatment | ~$1,000 | As needed |
| Roach treatment | ~$500 | As needed |
| Quarterly maintenance visit | ~$120 | 4x per year |
Baiting and trapping often make an infestation look worse before it improves — pests are flushed from hiding places. Consistent monitoring over 4–6 weeks, not immediate disappearance, is the real indicator of success.
Pro Tip: Ask any pest control company these five questions before booking: Are you licensed and insured in this state? What pesticides will you apply and are they safe for pets and livestock? Do you offer a re-treatment guarantee? What monitoring plan do you recommend between visits? Will you provide a written treatment report?
Pesticide safety, PPE, and the three C’s for spill response
Handling pesticides on a rural property carries real risk, especially near wells, livestock, and waterways. Clemson Extension’s pesticide spill guidelines recommend the three C’s as the primary response framework.
The three C’s:
- Control the source: stop the spill at its origin. Right the container, close the valve, or plug the leak. Keep bystanders and animals away.
- Contain the spread: build a dike of absorbent material (cat litter, sawdust, or commercial absorbent) around the spill perimeter. Do not let liquid reach drains, ditches, or soil near a well.
- Clean up: scoop absorbed material into a heavy-duty plastic bag, seal it, and label it with the pesticide name. Contact your county extension office or state environmental agency for approved disposal.
PPE checklist for mixing, applying, and spill cleanup:
- Chemical-resistant gloves (nitrile or neoprene, not latex)
- Safety goggles or face shield
- Respirator (N95 minimum for dusts; half-face respirator for liquid concentrates)
- Chemical-resistant coveralls or long sleeves and pants
- Chemical-resistant boots (rubber, not leather)
DIY spill kit to keep on hand:
- One 5-gallon bucket with a lid
- Cat litter or commercial absorbent (at least 5 lbs)
- Heavy-duty zip-lock bags and twist ties
- A small shovel or scoop
- Dish detergent and a scrub brush for hard-surface cleanup
- Printed emergency numbers: National Pesticide Information Center (1-800-858-7378) and your local Poison Control Center (1-800-222-1222)
Virginia Tech’s pesticide program recommends keeping no more pesticide on hand than you expect to use in a single season — less stored product means less spill risk.
Legal note: If a spill reaches a waterway, storm drain, or public road, most states require you to report it to your state environmental agency. Read the pesticide label — it is a legal document, and the label instructions govern.
How to prepare your property for a pest-control visit
A little prep before the technician arrives makes the visit faster and more effective.
Day-of tasks:
- Clear a 3-foot path around the foundation, inside and out.
- Move stored items away from walls in the garage, basement, and crawlspace.
- Secure pets in a room the technician won’t need to access.
- Empty under-sink cabinets if interior treatment is planned.
- Unlock outbuildings, sheds, and the crawlspace hatch.
Documentation to have ready:
- A written log of where and when you spotted pest activity (dates, locations, what you saw).
- Notes on any DIY treatments already applied (product name, date, location).
- Receipts or records of previous professional treatments.
- A sketch or photo of vulnerable areas: crawlspace entry, wood piles, grain storage.
Pro Tip: Fix simple exclusion items before the technician arrives — door sweeps, caulked cracks, hardware cloth over vents. Technicians spend less time on entry-point work and more time on treatment, which reduces call-backs.
A seasonal pest schedule for rural properties
Rural pest pressure shifts with the seasons. Here is a compact calendar to follow.
- Spring (March–May): Inspect for termite swarms and new wasp nest starts. Check crawlspace for winter moisture damage. Walk the perimeter for rodent burrows. Book your annual professional inspection.
- Summer (June–August): Mow grass short and check tick activity weekly. Treat wasp nests early while small. Inspect grain and feed storage monthly. Clean bins more frequently — heat accelerates odor and fly pressure.
- Fall (September–November): Rodent-proof before temperatures drop: seal all gaps, set snap traps in outbuildings, move firewood away from the house. Check attic vents and chimney caps.
- Winter (December–February): Monitor snap traps weekly. Inspect the attic for bat or squirrel entry. Check stored grain for rodent activity. Plan spring exclusion repairs.
Monthly monitoring log template:
Pro Tip: Keep this log on a clipboard in the garage. A 10-minute monthly walk-through with notes takes less time than a single emergency call-out.
Printable pest control checklist for rural homeowners
Print this page and tape it to a clipboard for your next property walk. Record the last inspection date and your next scheduled professional visit at the bottom.
Immediate (do this week):
- [ ] Caulk foundation cracks and gaps around pipes
- [ ] Install door sweeps on all exterior doors
- [ ] Cover crawlspace and attic vents with 1/4-inch hardware cloth
- [ ] Move firewood at least 20 feet from the house
- [ ] Set snap traps along walls in garage and outbuildings
- [ ] Secure all garbage bins with locking lids
Weekly:
- [ ] Check snap traps and reset as needed
- [ ] Inspect grain and feed storage for new droppings or chew marks
- [ ] Check tick activity on pets and family members after outdoor time
Monthly:
- [ ] Walk the full exterior perimeter (foundation, roofline, eaves)
- [ ] Inspect outbuildings and barns for new signs
- [ ] Clean garbage bins inside and out
- [ ] Update your monitoring log
Seasonal:
- [ ] Spring: inspect for termite swarms, wasp starts, crawlspace moisture
- [ ] Summer: mow short, treat small wasp nests, clean bins more often
- [ ] Fall: rodent-proof all gaps, move firewood, check chimney cap
- [ ] Winter: monitor traps weekly, inspect attic, plan spring repairs
Call a pro immediately if you see:
- [ ] Active termite mud tubes on foundation or joists
- [ ] Rodent droppings in more than one room
- [ ] A wasp or hornet nest larger than a softball
- [ ] Bats roosting in the attic
Last inspection date: ______________ Next scheduled pro visit: ______________
| Point | Details |
|---|---|
| Seal first | Caulk, door sweeps, and hardware cloth block entry before pests arrive. |
| Inspect outbuildings monthly | Barns and sheds are the first place rural pests establish a foothold. |
| Budget for prevention | A $100–$300 annual pest-control budget is cheaper than a single reactive treatment. |
| Call a pro for structural signs | Termite mud tubes, heavy rodent activity, and large wasp nests require licensed help. |
Why prevention beats chasing infestations after the fact
Reactive pest control is expensive and disruptive. A single rat infestation treatment runs around $1,000; a roach treatment around $500. Quarterly professional maintenance at roughly $120 per visit costs less than one emergency call-out per year. The math is straightforward, and the property-value argument is even clearer: structural damage from termites or carpenter ants compounds silently for years before it shows up in a home inspection.
What most rural homeowners underestimate is how much of pest control is just property maintenance done consistently. The homeowners who never face a serious infestation are not lucky — they are the ones who walk their perimeter in March, clean their bins in July, and seal gaps in October. A survey found only 22% of Americans feel fully confident handling pests themselves. The gap between confidence and competence closes fast when you have a checklist and a schedule. Keep records. Do the seasonal rounds. The monitoring log is not busywork — it is the difference between catching a problem at $200 and catching it at $2,000.
Clean bins mean fewer pests: how Abcbins helps rural homeowners
Dirty garbage bins are one of the most overlooked pest attractants on a rural property. Food residue on the rim and inside the can draws flies, rodents, and raccoons within hours of a pickup. Regular bin cleaning removes that attractant at the source.

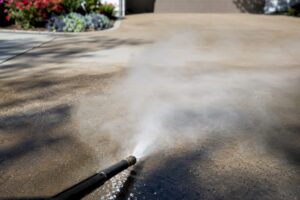
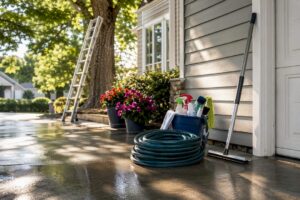
Abcbins provides professional trash bin cleaning throughout Chicagoland on monthly, bi-monthly, and quarterly service plans — or on demand when you need it. All wastewater is captured on board, so nothing runs off into your yard, garden, or nearby water sources. You don’t need to be home. Abcbins handles the job curbside while you’re away. To add bin cleaning to your pest prevention plan, schedule your first service or browse the full range of pressure washing and bin cleaning services available for rural and residential properties.
Sources
- Why Americans turn a blind eye to home infestations
- PestWorld press release on top pests and prevention
- Pesticide Spill: Safe Management & Cleanup Guidelines | Home & Garden Information Center
- Modern Pest Services releases survey results of household pest myths and misconceptions
- Rural Home Annual Maintenance Checklist – Rural Home Guide